How to Assign Food and Recipes to a Client Nutrition Plan
This guide walks you through how to build or edit a nutrition plan using meals and individual food items. This method allows you to structure a client’s plan based on real foods and recipes, while automatically calculating calories and macronutrients.
Written By Jacob Elliott
Last updated 4 months ago
Step 1: Navigate to Nutrition Plans
Open the Nutrition tab.
Select Nutrition Plans.
Choose the nutrition plan you want to create or edit for the specific client.
(Once you have created your nutrition plan)
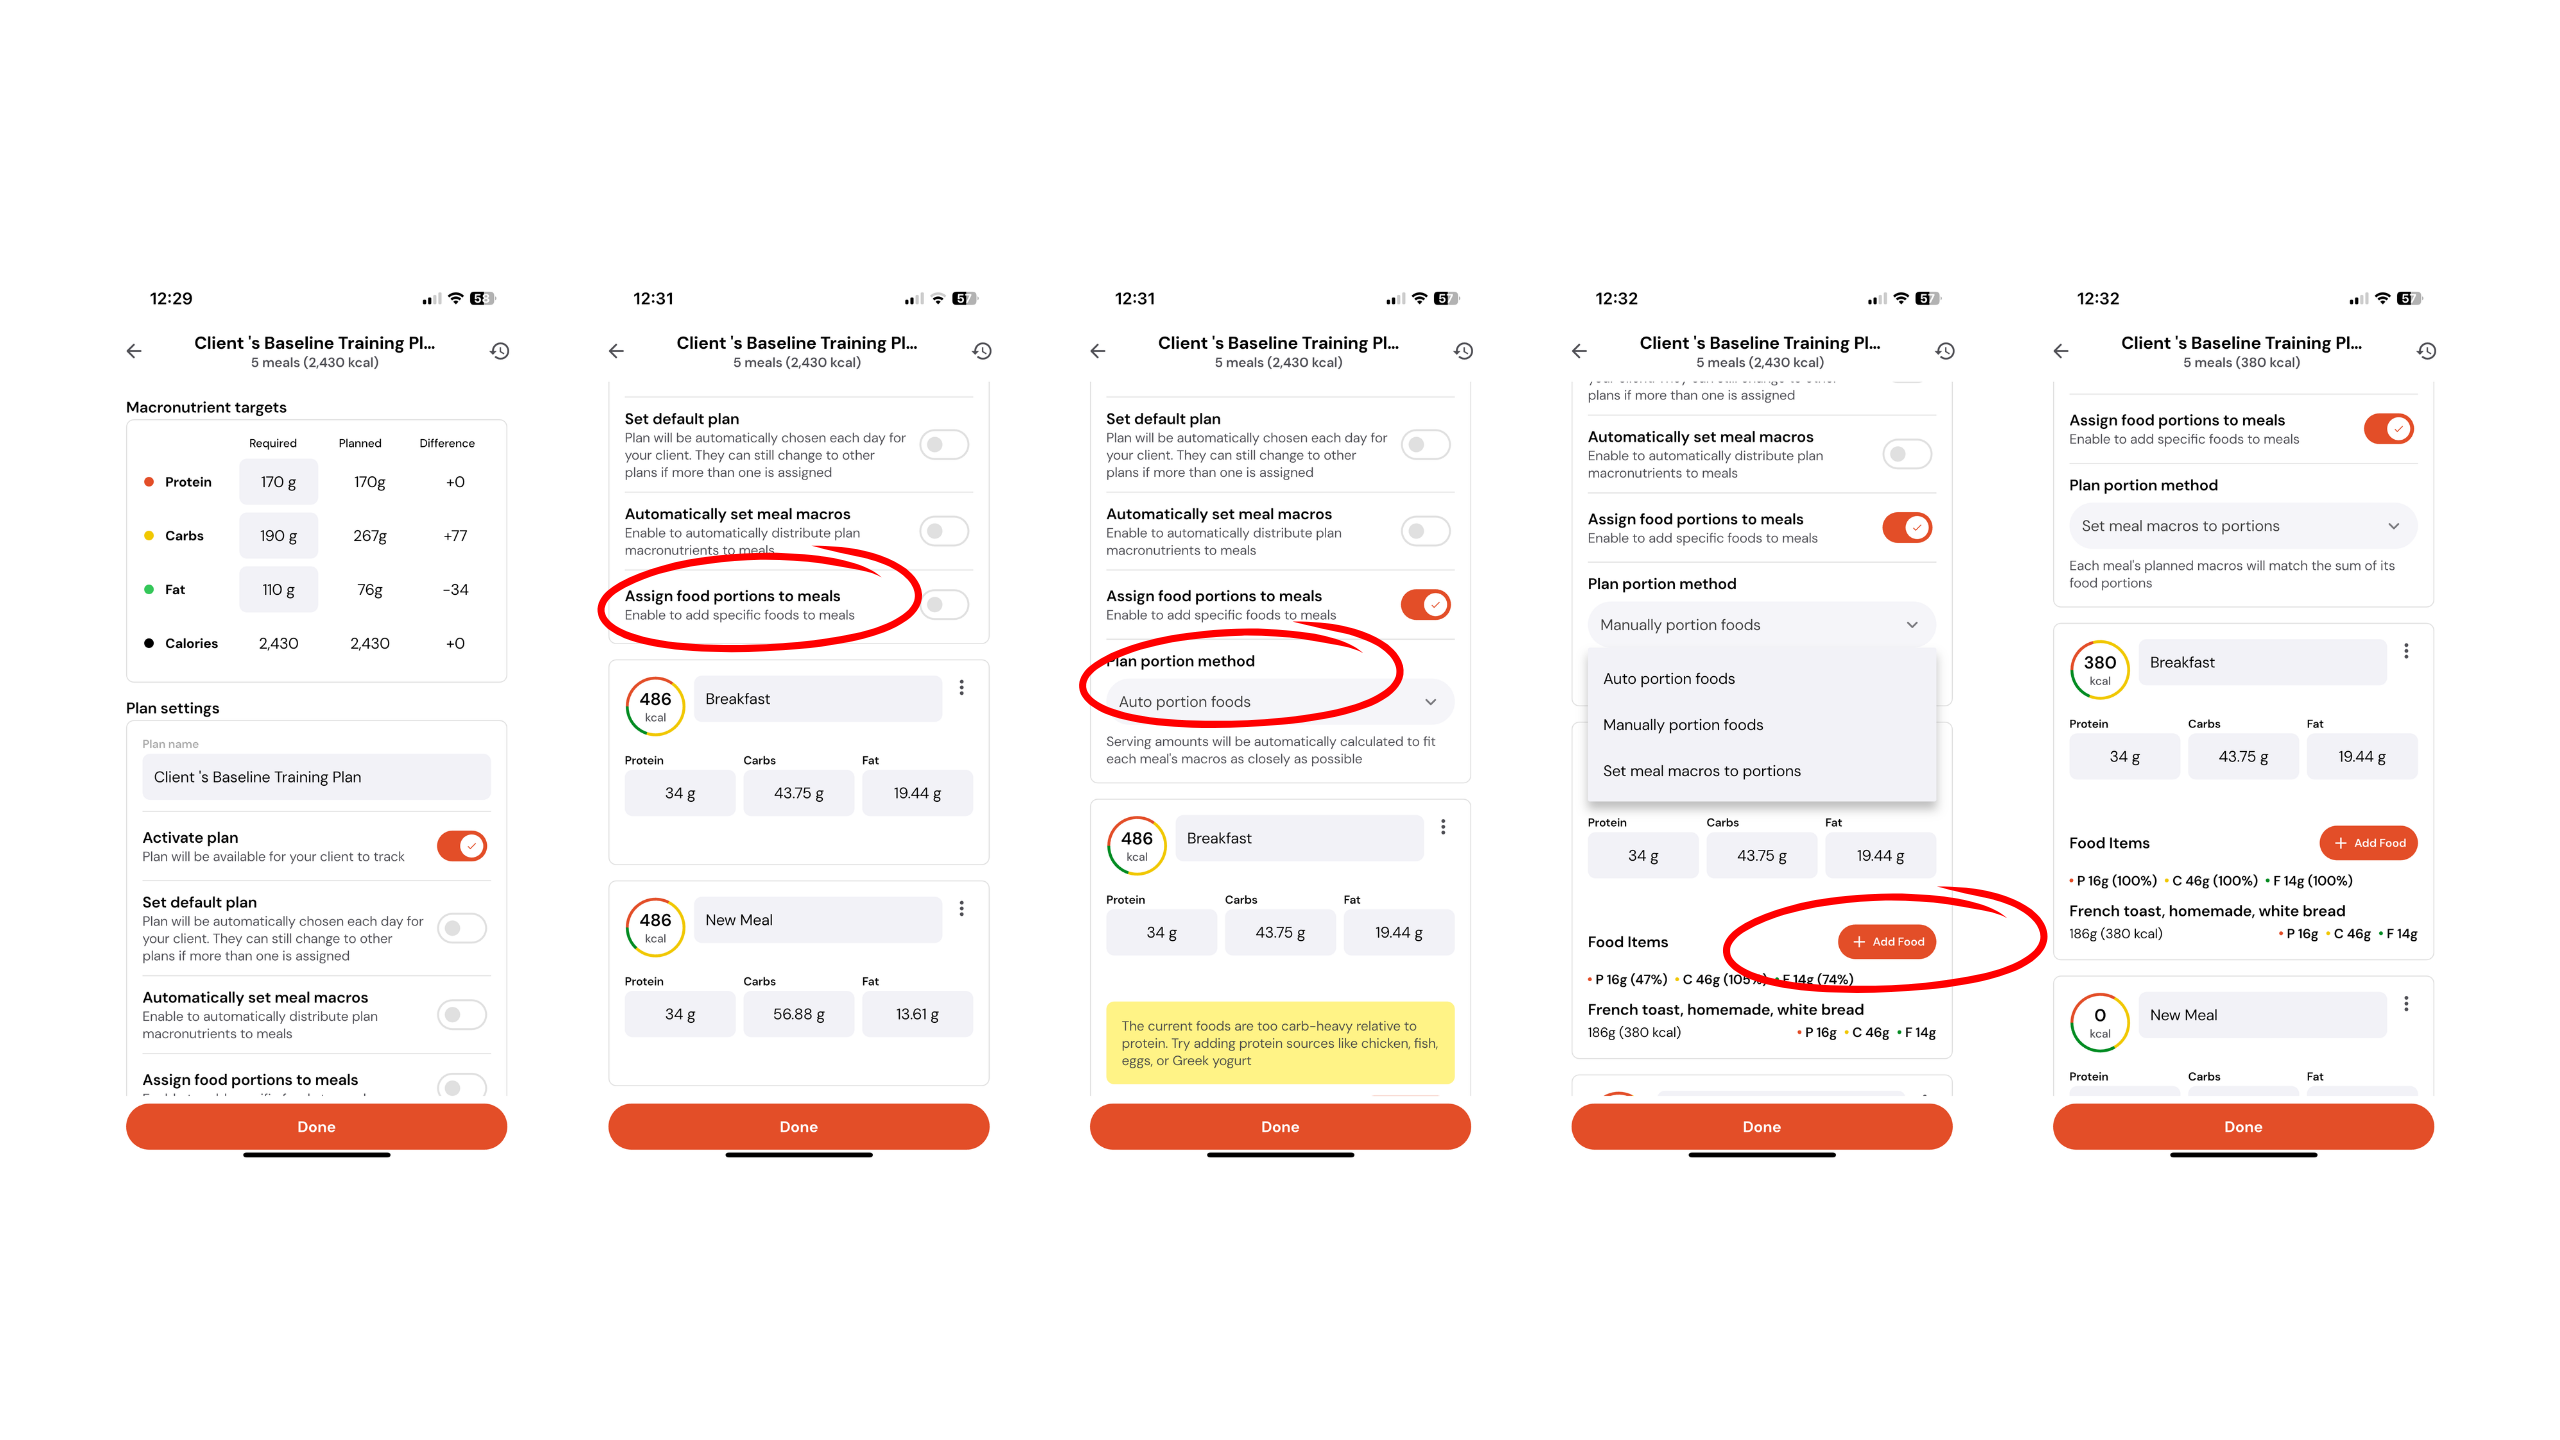
Step 2: Enable Food Portions for Meals
Scroll down slightly within the nutrition plan.
Toggle on Assign Food Portions to Meals.
Once enabled, you’ll see the Plan Portion Method options.
Step 3: Choose Your Portion Method
By default, the plan will be set to Auto-Portion Foods.
Option 1: Auto-Portion Foods
Add individual food items directly to each meal.
Adding foods to meal this way, will not affect the calories or macros on the programmed meal.
Option 2: Set Meal Macros to Portions
Select Set Meal Macros to Portions if you prefer to define meals by macro targets.
Add foods to each meal and the total calories and macros will adjust based on the foods included.
Step 4: Review Macro Targets
Scroll back up to view the macronutrient targets.
These targets show what is planned versus what is required, updating dynamically as foods and meals are added.
Step 5: Save the Plan
Once you’re happy with the meals, foods, and macro targets:
Click Done or Save to apply the nutrition plan to the client.