How to create a custom food (Manually)
How to create a custom food in CoreCoach
Written By Jacob Elliott
Last updated 8 months ago
To create a custom food in CoreCoach, first navigate to the nutrition tab. Once in the nutrition tab, then click on the My food tabs.
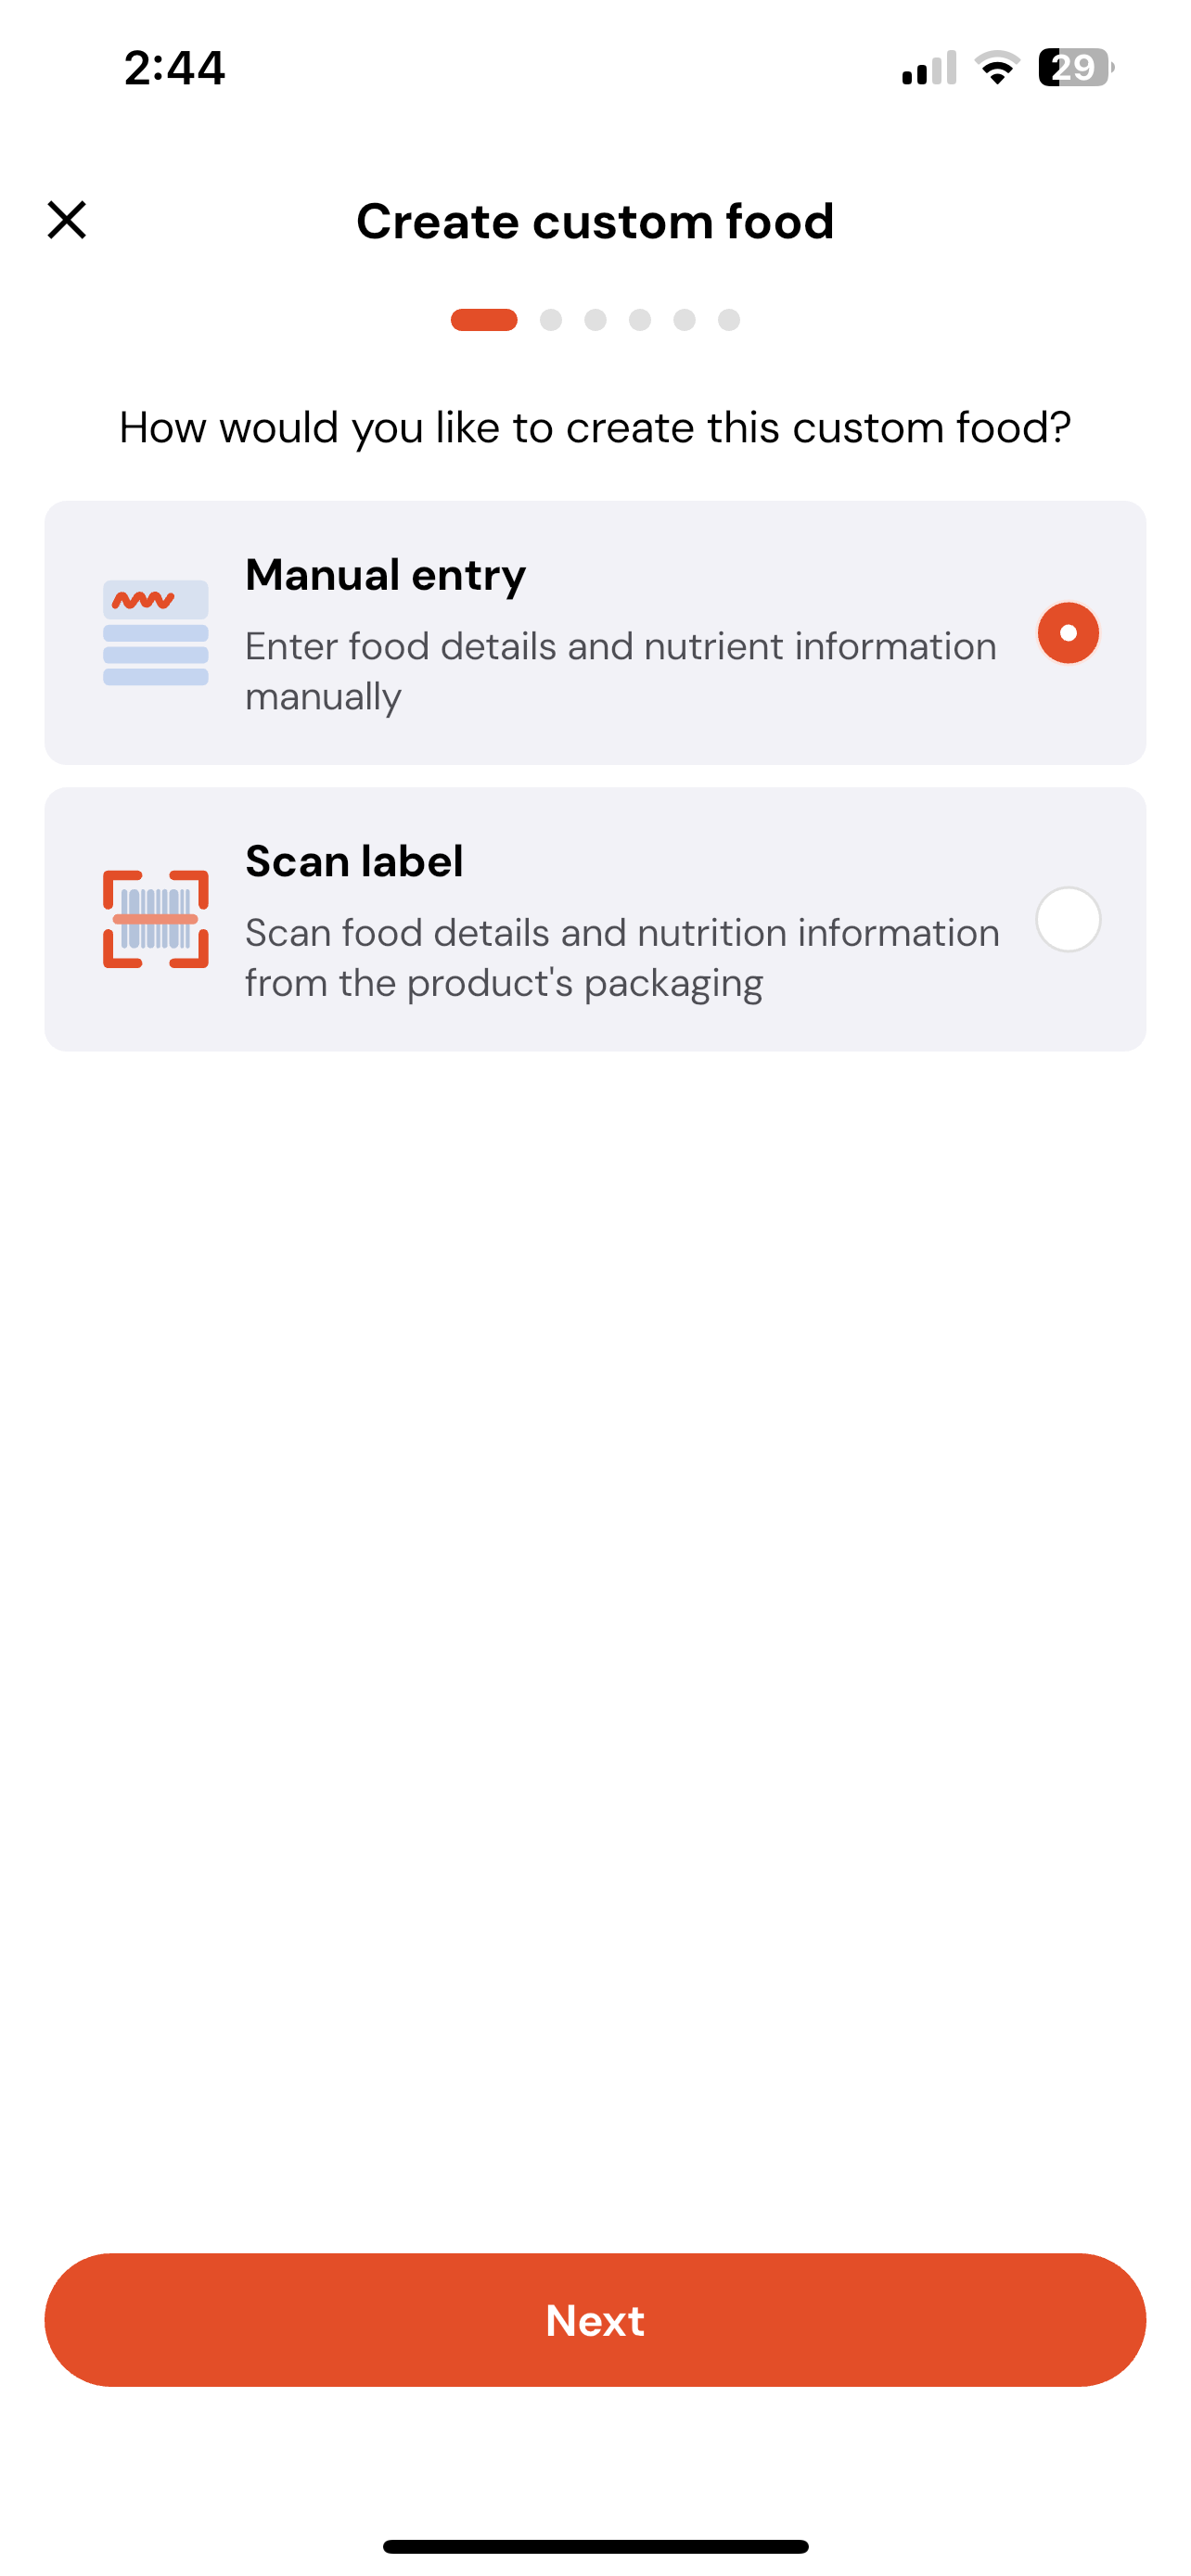
1) Choose how to create the food
(Select Manual entry for this example) – type the food’s details and nutrition yourself.
Tap Next to continue.
2) Enter Food Details & Servings
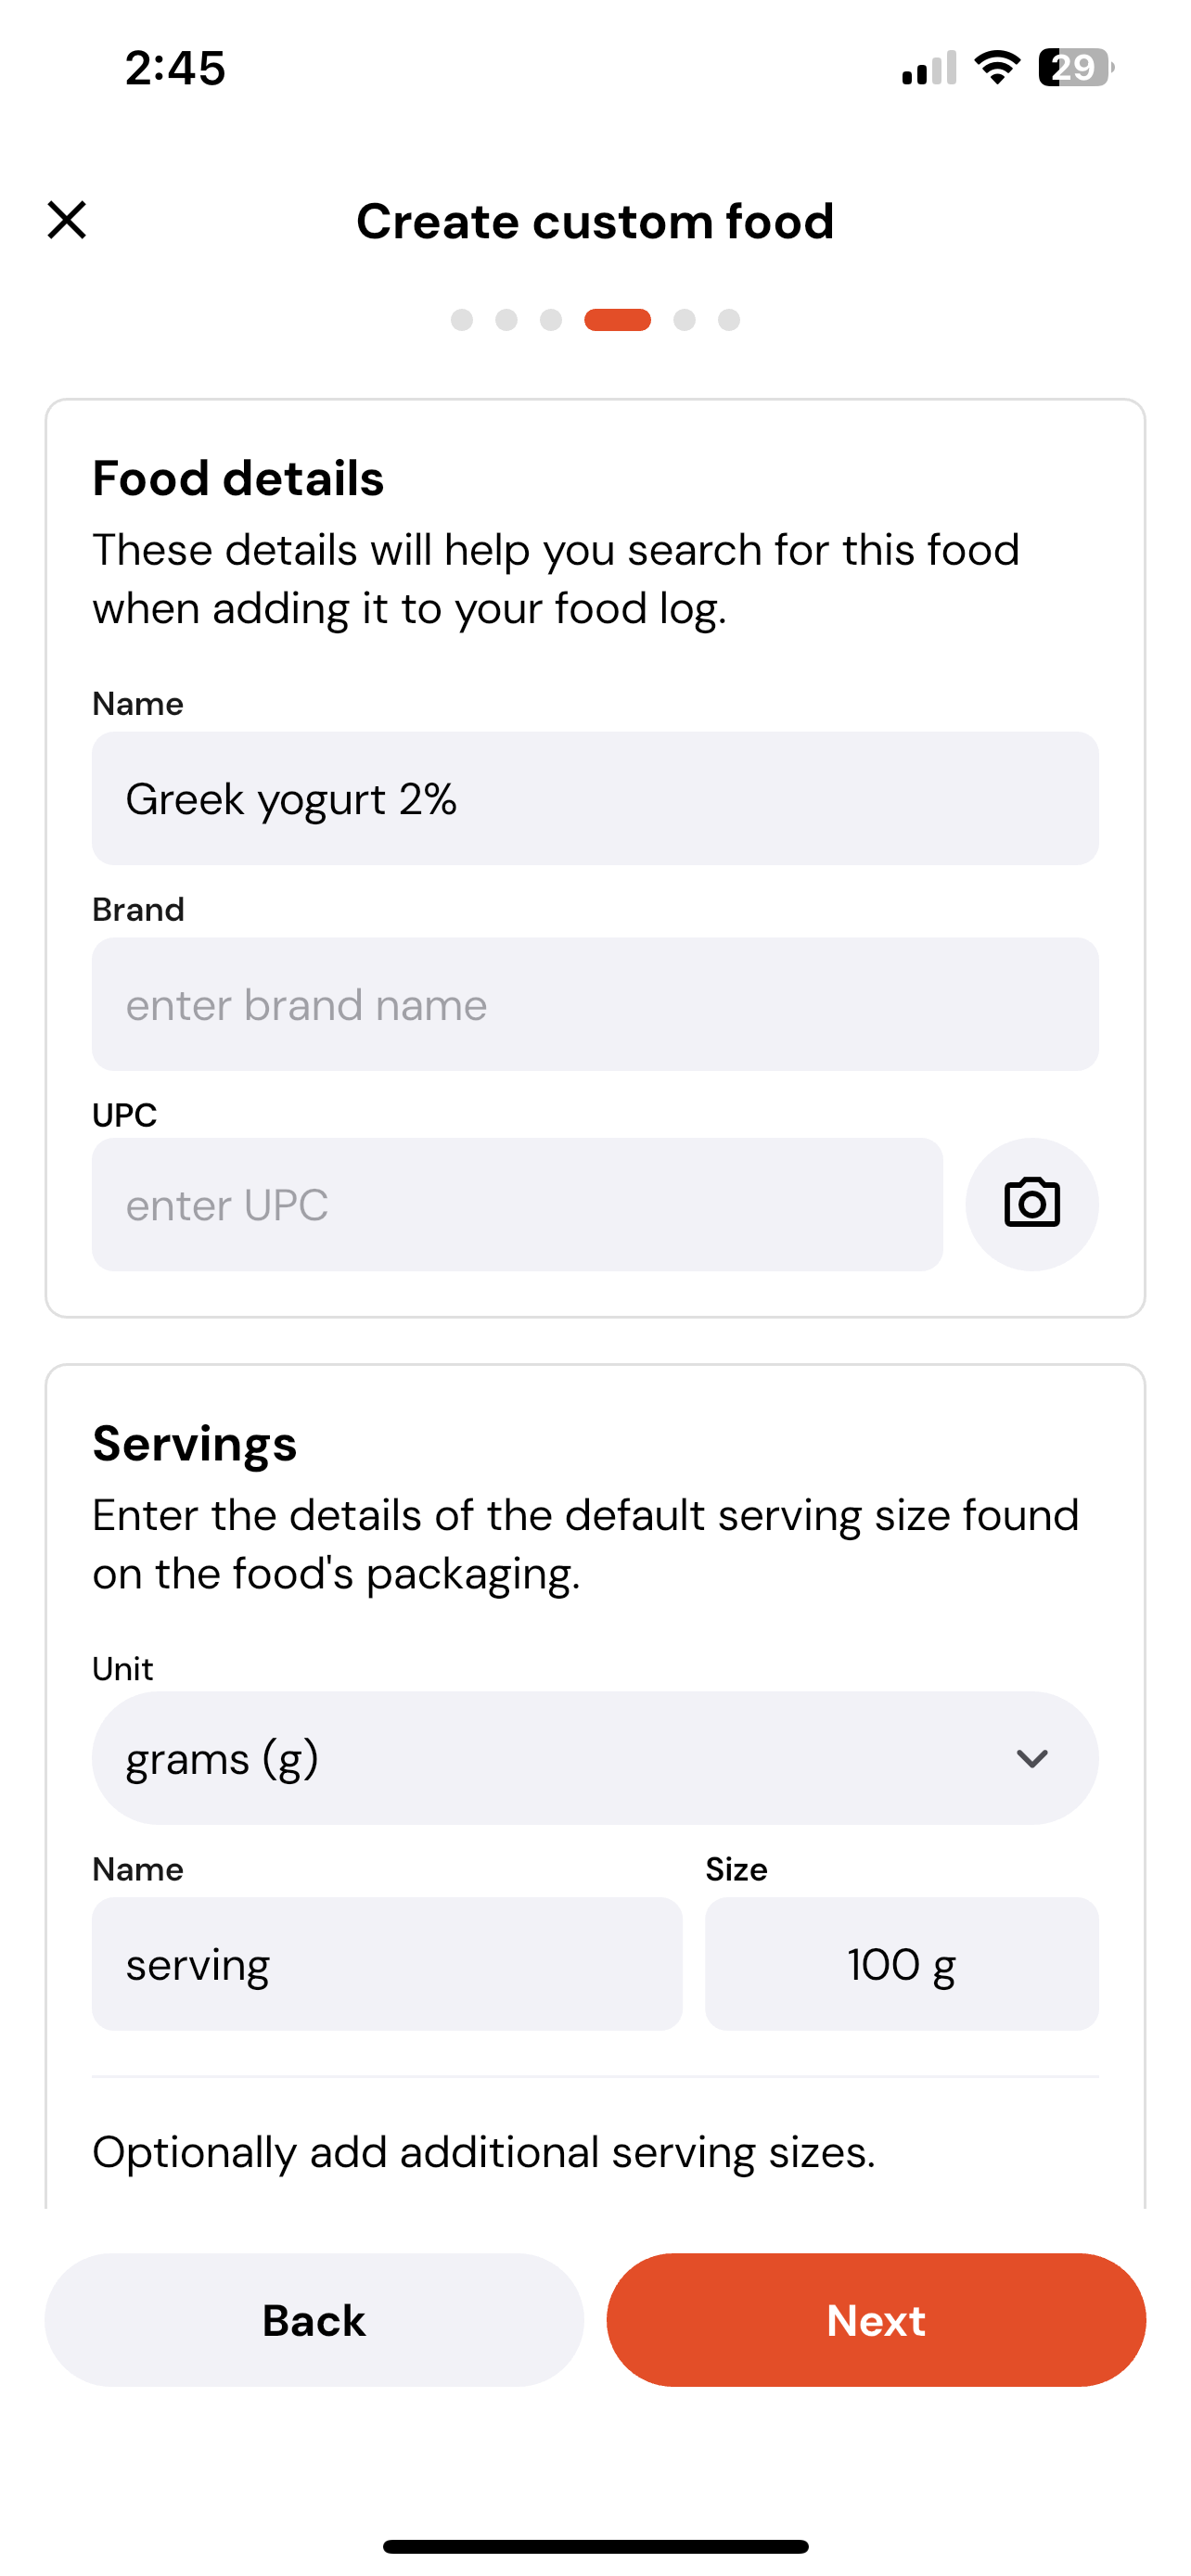
Food details
Name – what you’ll search for (e.g., “Greek yogurt 2%”).
Brand (optional) – helps future search.
UPC (optional) – barcode number; tap the camera to scan if available.
Servings
Unit – select the base unit (e.g., grams).
Default serving – give the serving a name (e.g., “serving”) and a size (e.g., 100 g).
Additional sizes (optional) – add common sizes (e.g., “tablespoon – 15 g”, “cup – 200 g”).
Tap Next when done.
3) Enter Nutrient Details
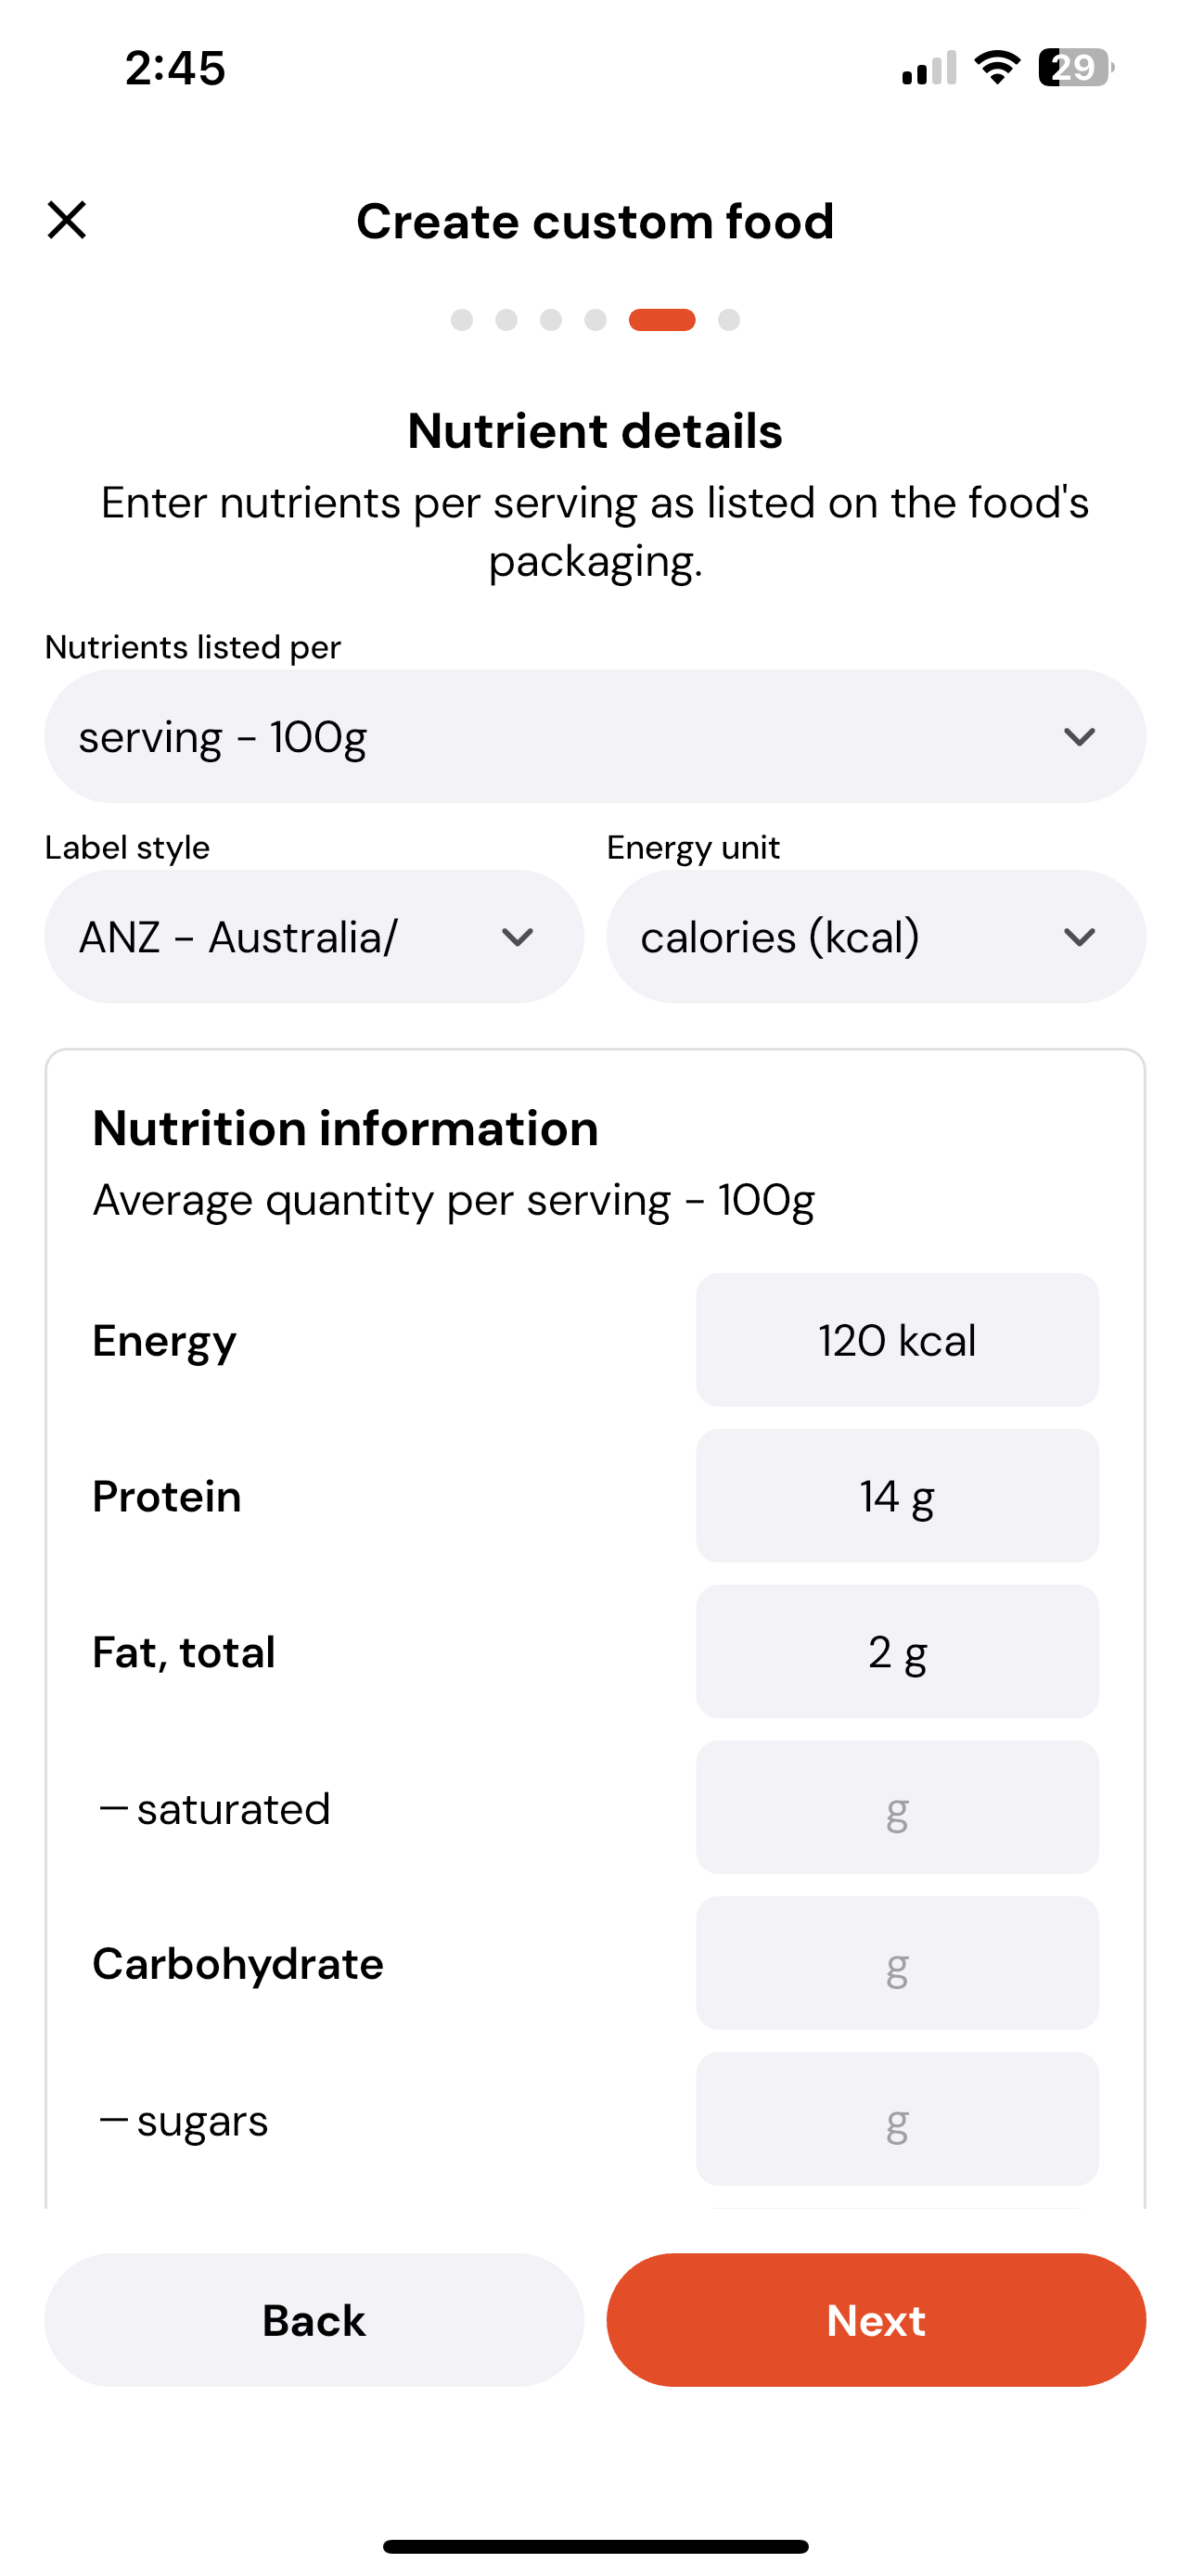
Nutrients listed per – choose per serving or per 100 g (match the label).
Label style – choose the region style (e.g., ANZ – Australia/…).
Energy unit – choose calories (kcal) or kilojoules (kJ).
Then fill out the fields shown:
Energy, Protein, Fat (total & saturated), Carbohydrate (and sugars).
Optional micros (dietary fibre, sodium, vitamins, minerals). Use the units displayed (g, mg, µg).
Tap Next when complete.
4) Review & Confirm
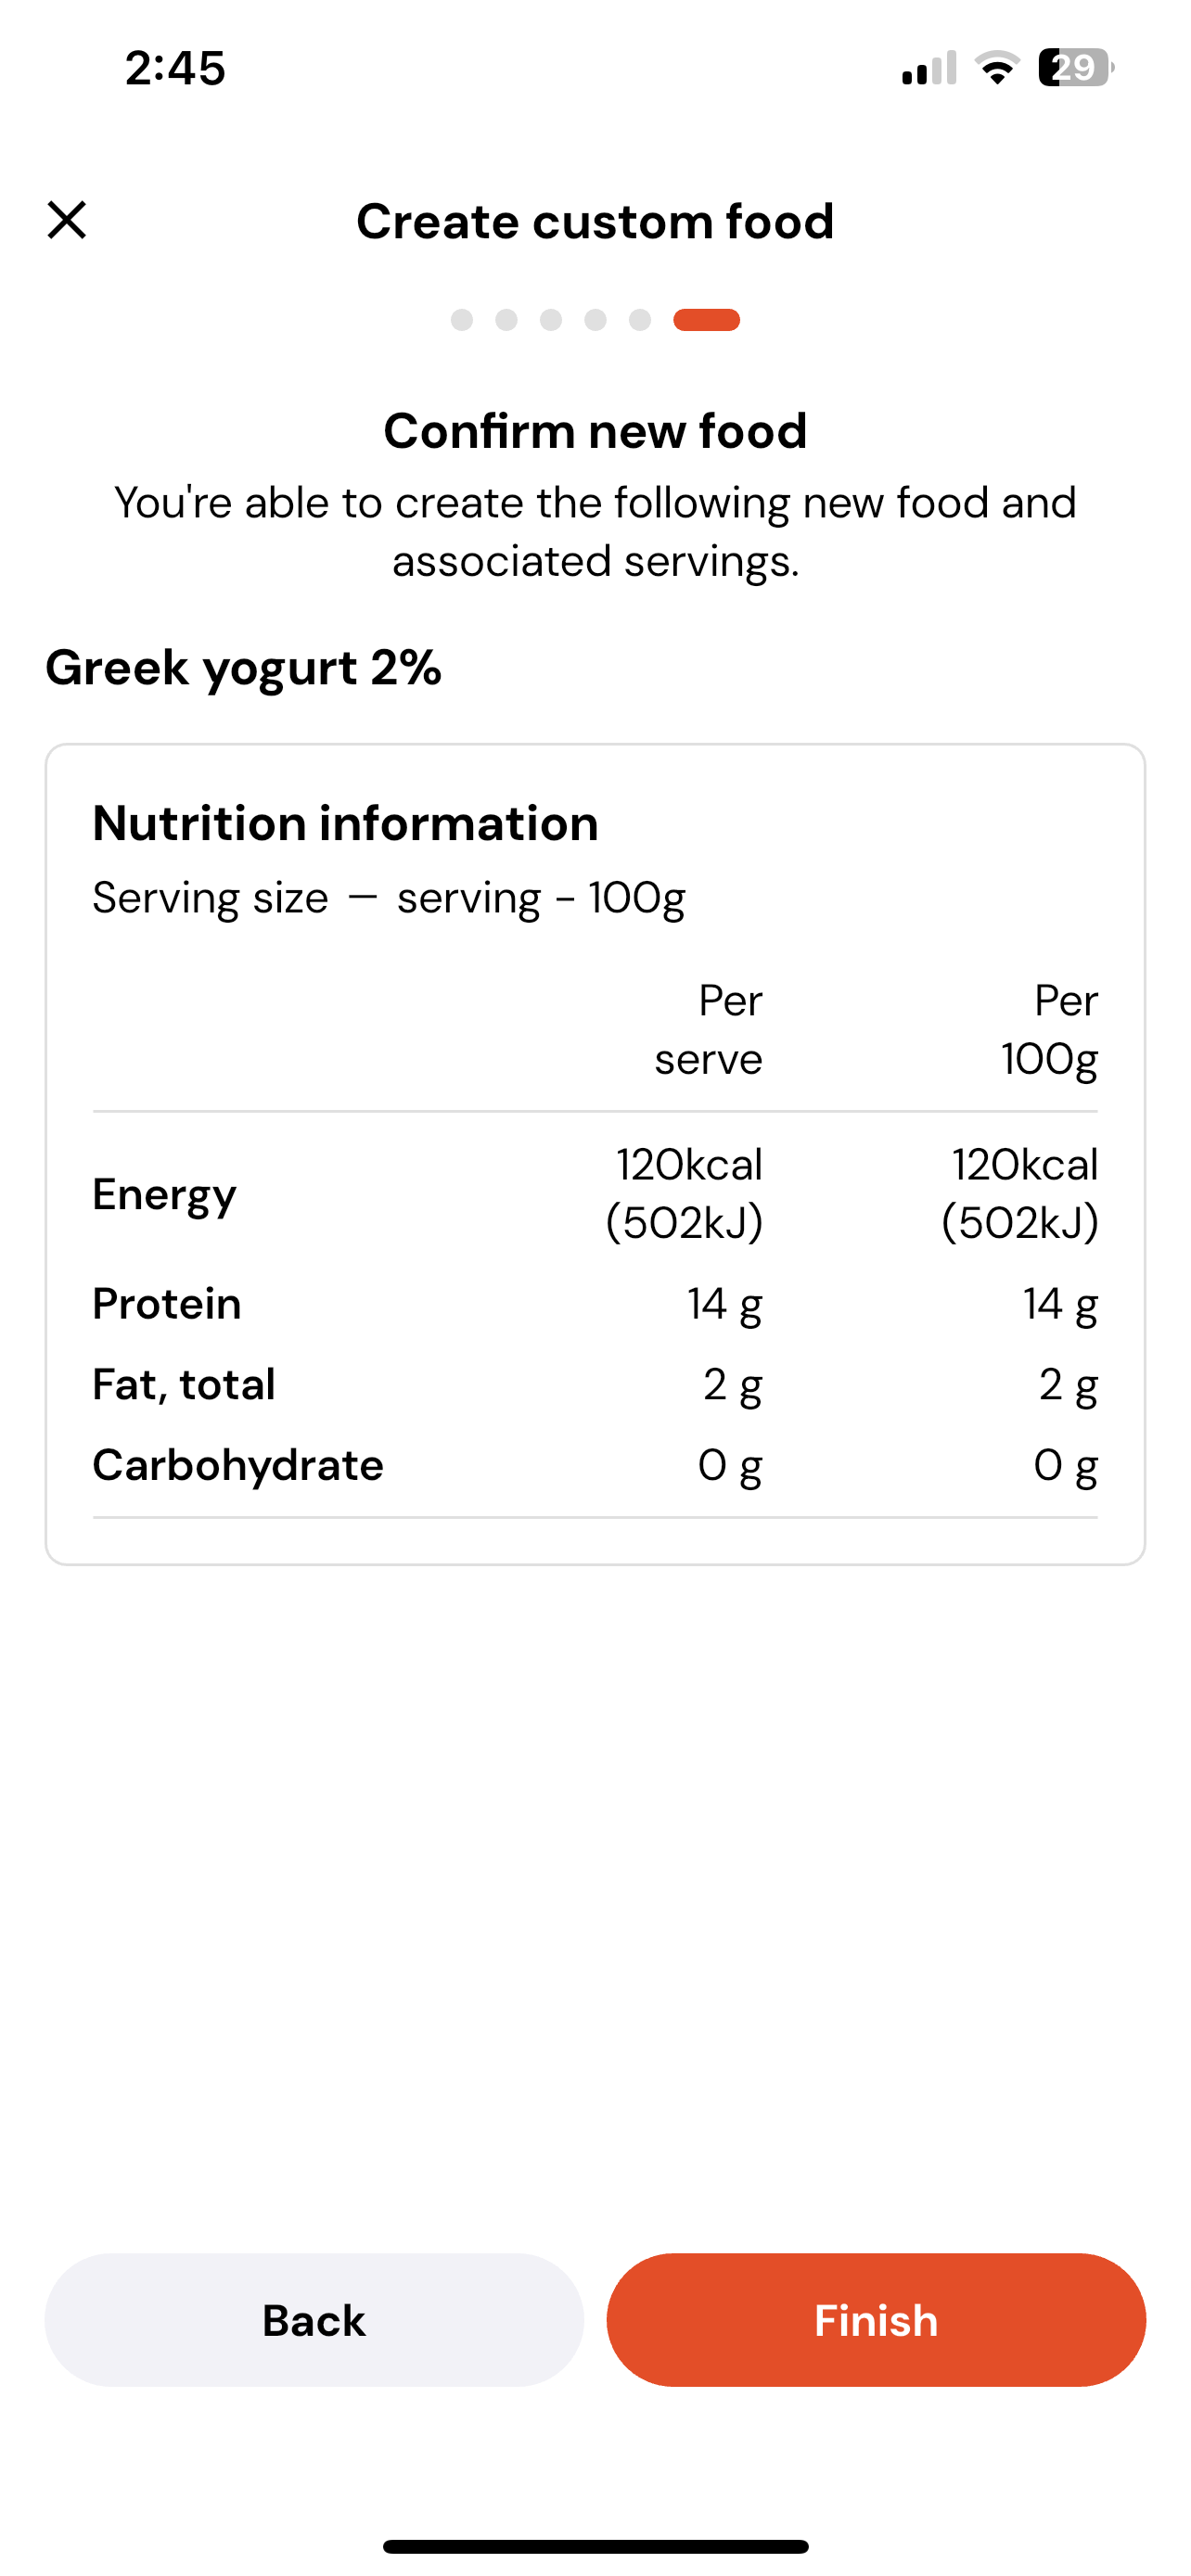
You’ll see a summary card with Nutrition information displayed Per serve and Per 100 g based on what you entered.
Check the serving size, energy, protein, fat, carbs, and any micros.
Tap Back to fix anything, or Finish to save.
Was this helpful?
Still need help? Share an idea